Token Authentication sample for Azure Active Directory
Contents
About this sample
Run this sample
Sample details
About this sample
The Token project contains a simple console application that connects to Azure SQL database using a self-signed certificate.
Software prerequisites:
- The
makecert.exeutility, which is included in the Windows SDK- It is sometimes included in Visual Studio installations (depending on the selections made during installation). A search of your machine for
makecert.exewould provide verification that the Windows SDK was installed. - If the Windows SDK was not installed, you may download it here
- You can learn more about the
makecert.exeutility here
- It is sometimes included in Visual Studio installations (depending on the selections made during installation). A search of your machine for
- PowerShell with Azure Active Directory Module
- To download the latest PowerShell version see this page
- Install the Azure AD PowerShell Module, if it is not already installed in your client machine.
Other Prerequisites
TODO: Other Prerequisites
Run this sample
-
Create an application account in Azure AD for your service.
- Sign in to the Azure management portal.
- Click on Azure Active Directory in the left hand navigation
- Click the directory tenant where you wish to register the sample application. This must be the same directory that is associated with your database (the server hosting your database).
- Click the Applications tab
- In the drawer, click Add.
- Click "Add an application my organization is developing".
- Enter mytokentest as a friendly name for the application, select "Web Application and/or Web API", and click next.
- Assuming this application is a daemon/service and not a web application, it doesn't have a sign-in URL or app ID URI. For these two fields, enter http://mytokentest
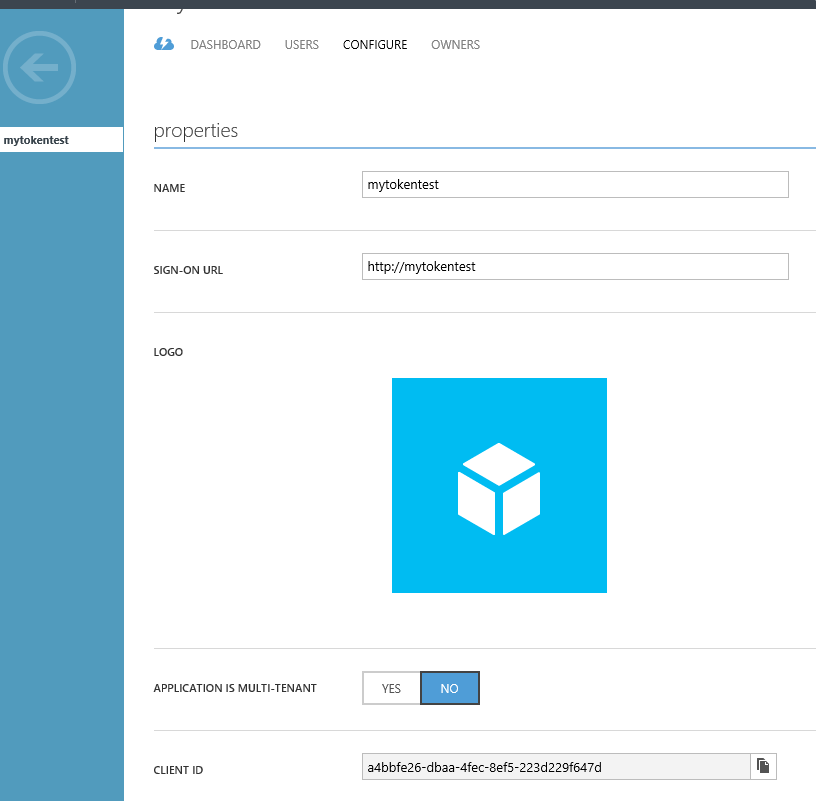
- While still in the Azure portal, click the Configure tab of your application.
- Find the Client ID value and copy it into a text editor, you will need this later when configuring your application ( i.e. a4bbfe26-dbaa-4fec-8ef5-223d229f647d /see the snapshot below/)
-
Logon to your Azure SQL Server’s user database as an Azure AD admin and using a T-SQL command provision a contained database user for your application principal:
CREATE USER [mytokentest] FROM EXTERNAL PROVIDER- See this link for more details on how to create an Azure Ad admin and a contained database user.
-
On the machine you are going to run the project on, generate and install a self-signed certificate.
- To complete this step, you will need to use
Makecert.exe - Open a command prompt window
- Navigate to a folder where you want to generate a certificate file ( such as the folder where the demo files are) and change the following command for your environment
<Windows SDK Path>\makecert.exe -r -pe -n "CN=Cert_name" -ss My -len 2048 Cert_name.cerfor example, like so:
c:/"Program Files (x86)/Windows Kits/8.1/bin/x64"/makecert -r -pe -n "CN=mytokentestCert" -ss My -len 2048 mytokentestCert.cer - To complete this step, you will need to use
-
Add the certificate as a key for the application you created in Azure AD.
- Click the Microsoft Azure Active Directory Module for Windows PowerShell shortcut on desktop to open a Windows PowerShell workspace that has the Azure AD cmdlets.
- Copy the following code snippet to a text editor.
connect-msolservice

$cer = New-Object System.Security.Cryptography.X509Certificates.X509Certificate
$cer.Import("<full path>\Cert_name.cer")
$binCert = $cer.GetRawCertData()
$credValue = [System.Convert]::ToBase64String($binCert);
New-MsolServicePrincipalCredential -AppPrincipalId "<client id>" -Type asymmetric -Value $credValue -Usage verify
+ Replace <full path> with the path to your certificate and Cert_name with your Certificate name that you used in step 3 above. + Replace <client id> with the client ID you copied in step 1. + Copy and paste your snippet into the powershell window and run it.- The following command will verify that you added the certificate to your application's Active Directory Registration
Get-MsolServicePrincipalCredential –ServicePrincipalName "URL"-ReturnKeyValues 0
-
Configure the certificate and your application account in the app.config file in the project.
- In Visual Studio, open app.config in the Solution Explorer

- Find the app key
ida:Tenantand replace the value with your AAD tenant name (your AAD domain) - Find the app key
ida:ClientIDand replace the value with the Client ID for the application registration from the Azure Portal (the value from step 1). - Find the app key
ida:Cert_Nameand replace the value with the subject name (CN) of the self-signed certificate you created - For example:
<add key="ida:Tenant" value="cqclinic.onmicrosoft.com" /> //this is the AAD domain <add key="ida:ClientId" value="a4bbfe26-dbaa-4fec-8ef5-223d229f647d"/> //this is the Client ID <add key="ida:CertName" value="CN=mytokentestCert"/> //this is the Cert_name use by makecert.exe - Find the app key
- In Visual Studio, open Program.cs in the Solution Explorer

- Make the following changes:
    builder["Data Source"] = "aad-managed-demo.database.windows.net"; // replace with your server name
    builder["Initial Catalog"] = "demo"; // replace with your database name
- In Visual Studio, open app.config in the Solution Explorer
-
Run the demo. (Click Run or press F5)
- A successful authorization should result in a message that states "Connected to the database" similar to the following:

- A successful authorization should result in a message that states "Connected to the database" similar to the following:


